How to establish a MongoDB to connect with QNAP NAS via QIoT Suite Lite ?

In this tutorial, you will learn how to establish a MongoDB to connect with QNAP NAS via QIoT Suite Lite.
Step_1: Open Container Station and Set Up MongoDB
● Click "Container Station".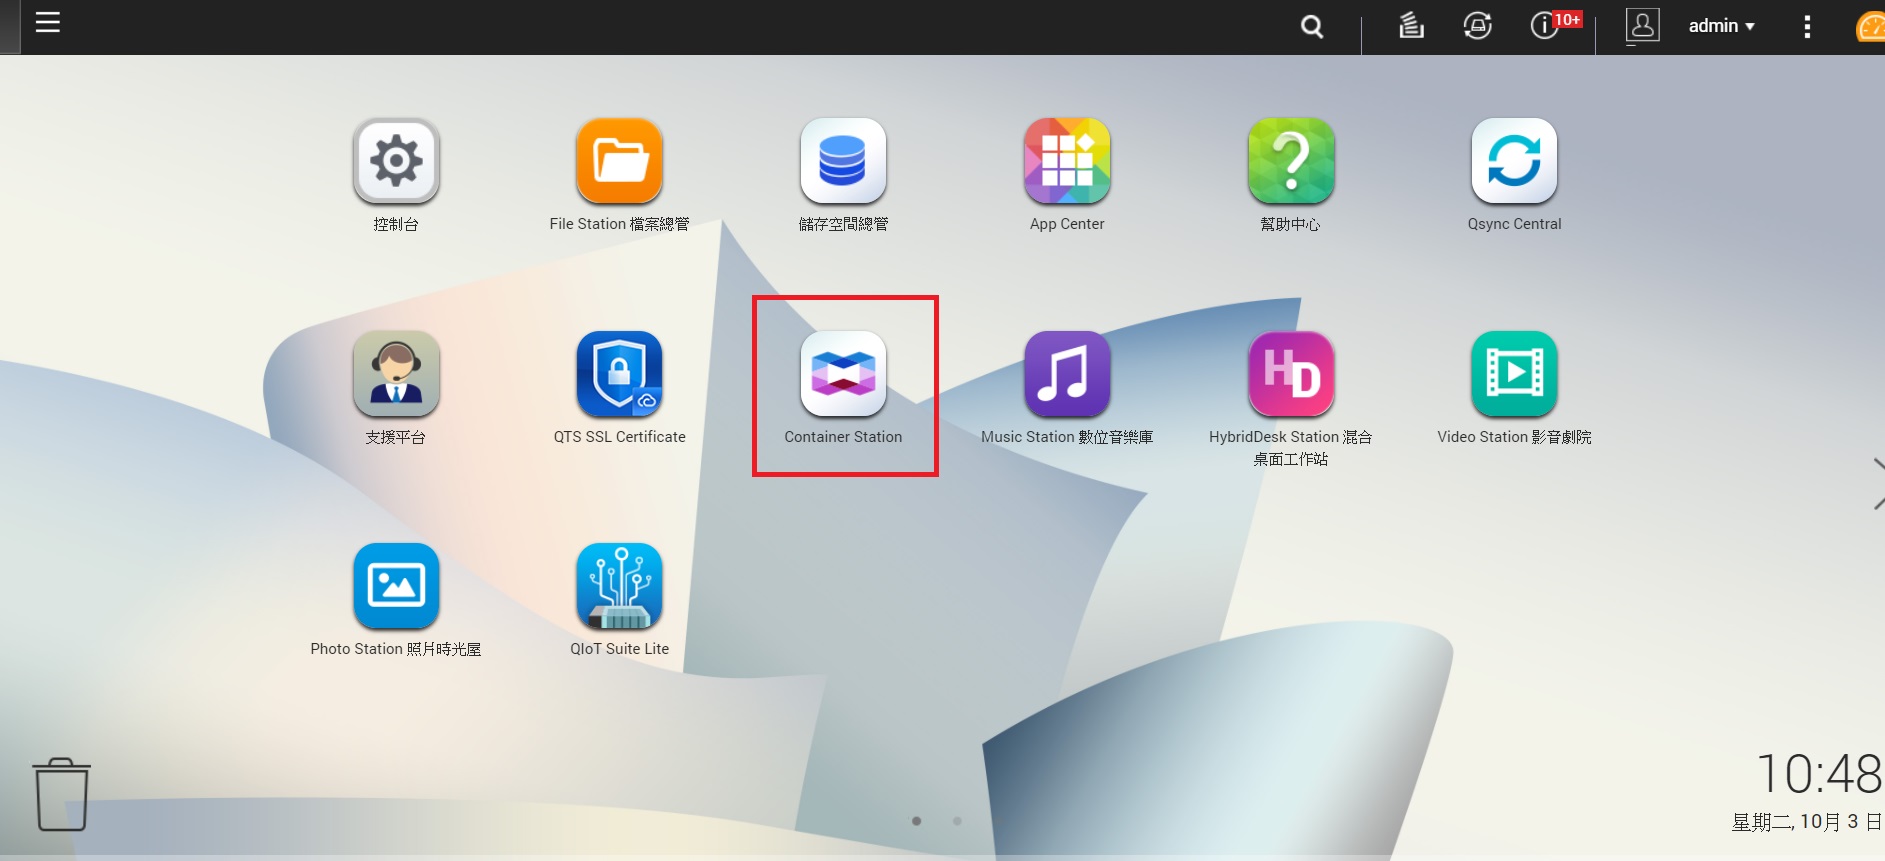
●Click "Create Container".
●Go to MongoDB and click "Install" (Click "MongoDB" for more information).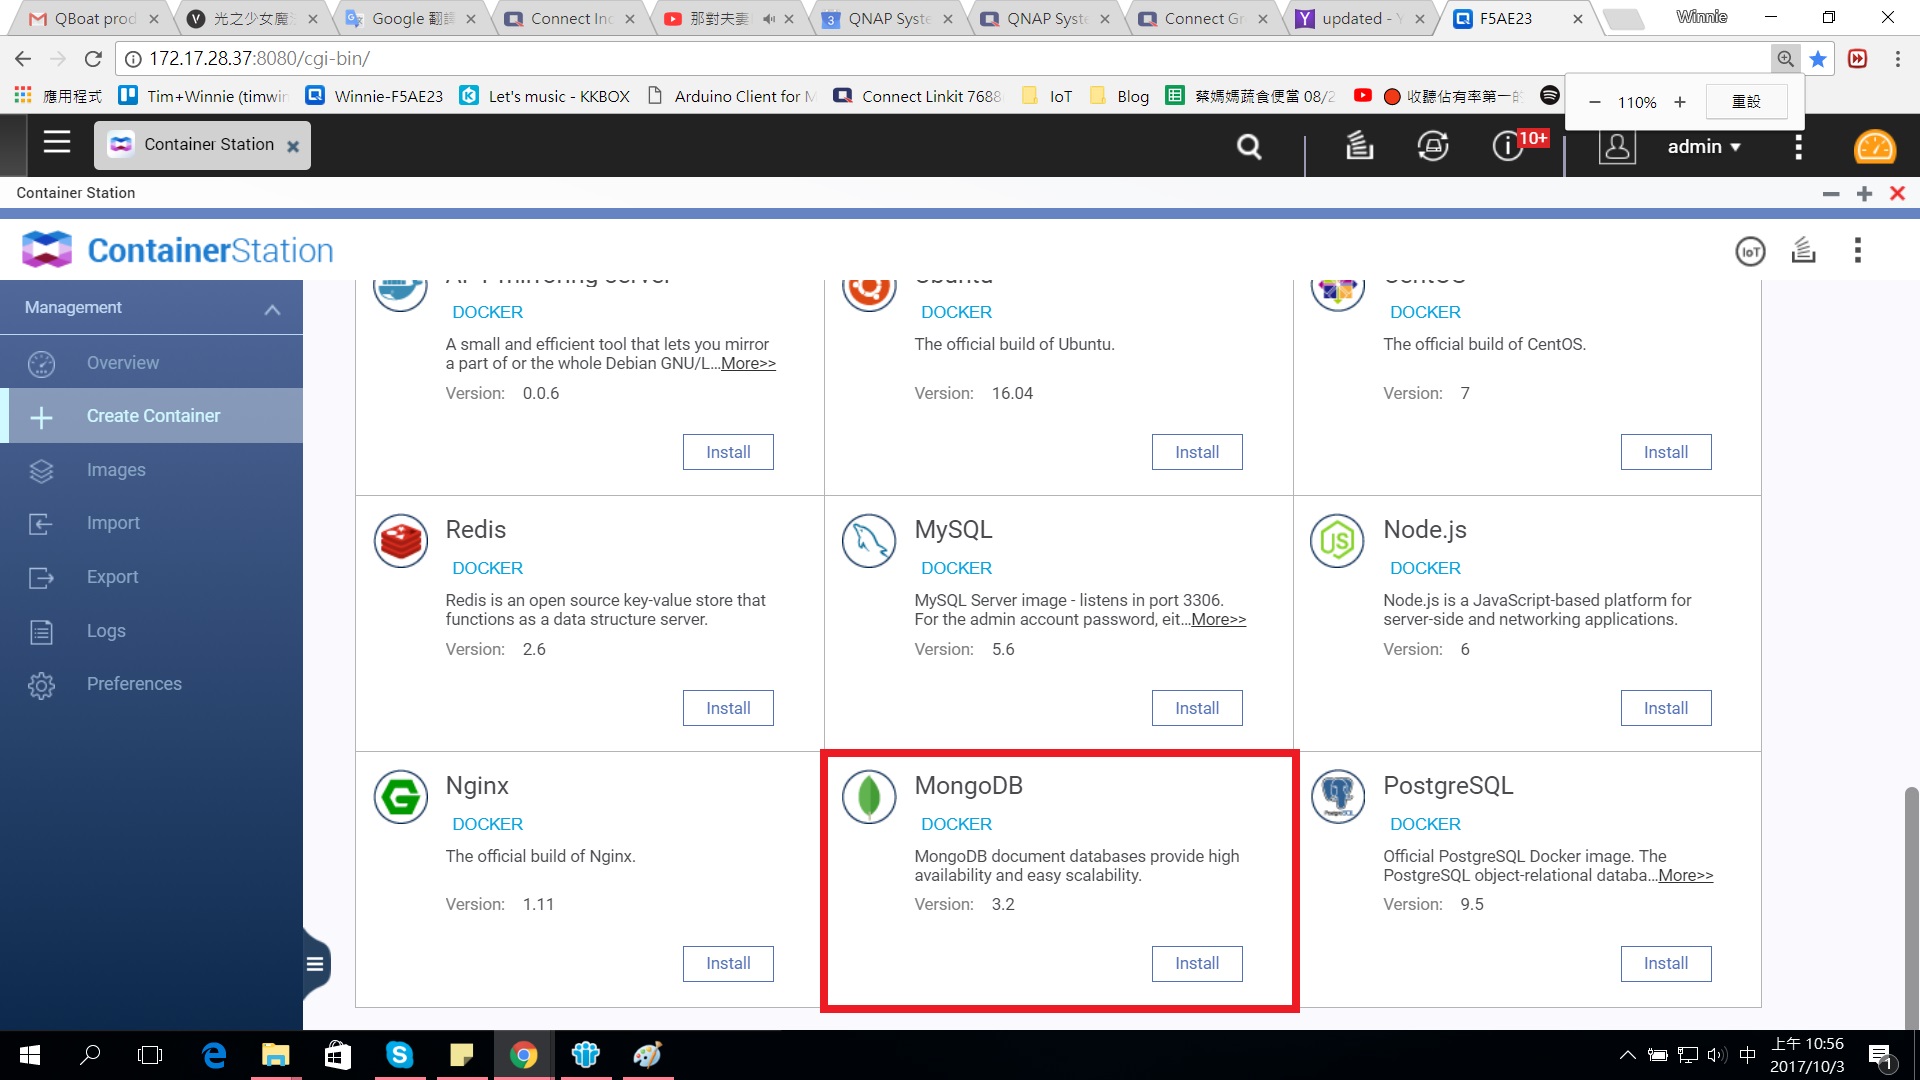
●Click "Create"
●This will install an empty container. You will need to install, remove, and then install a new MongoDB.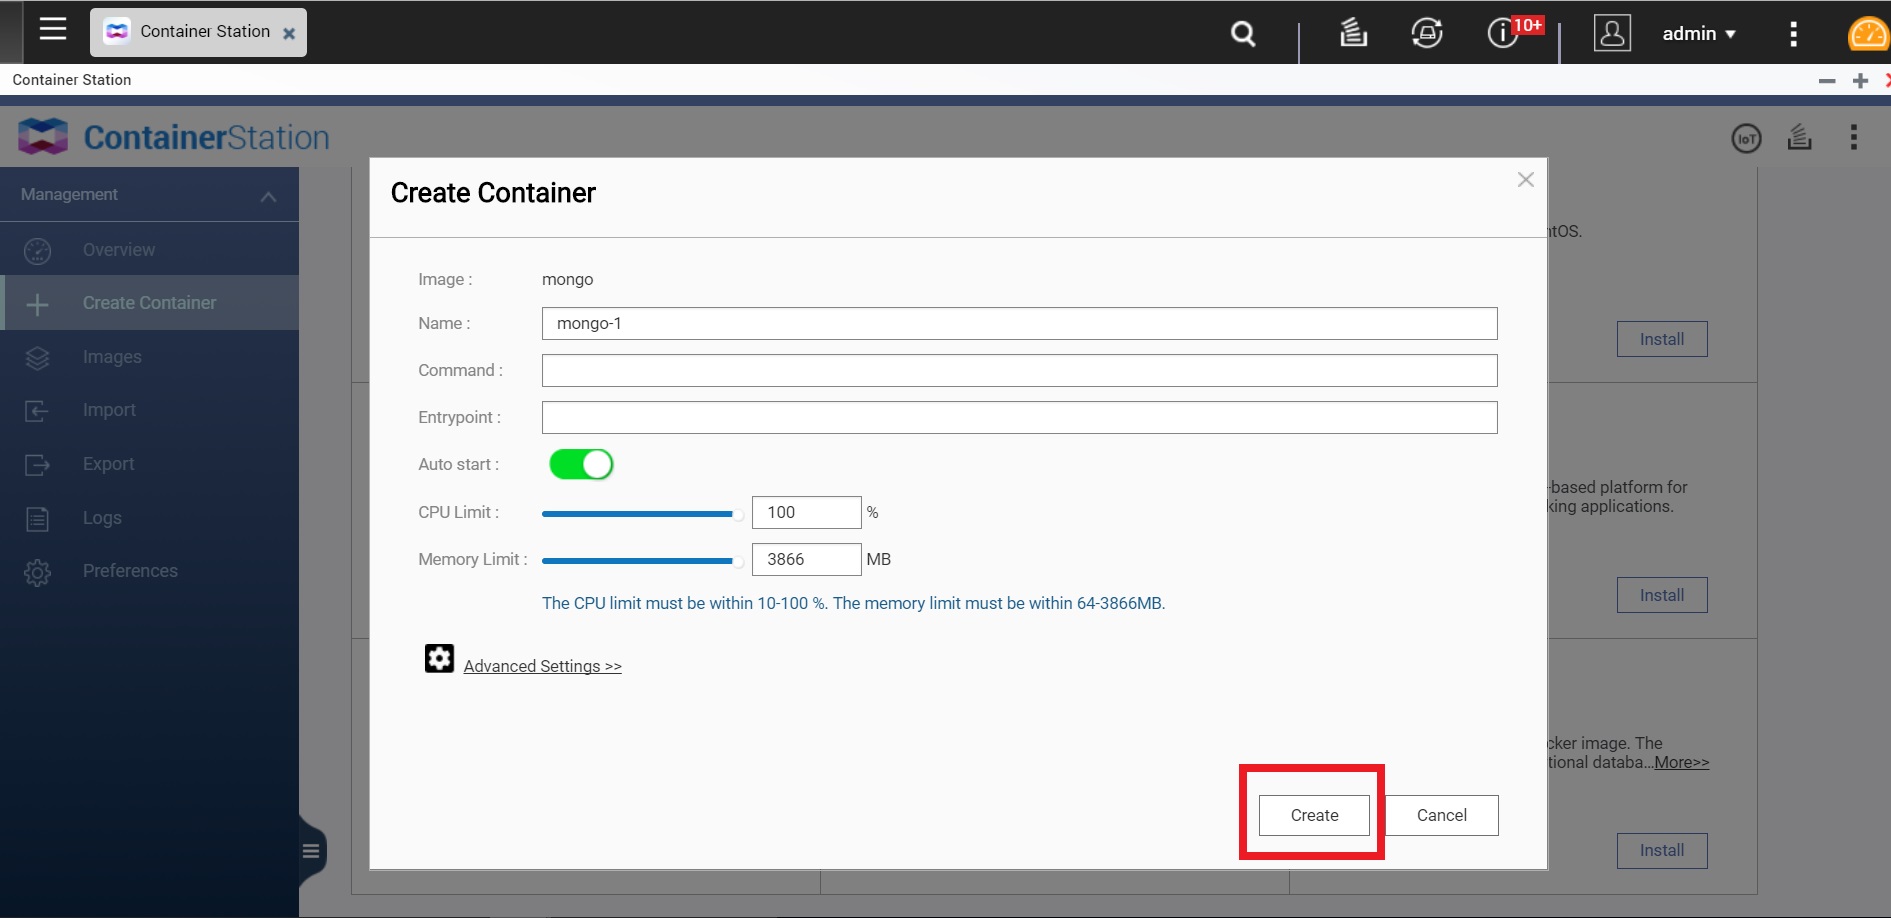
●Choose the containerand remove it.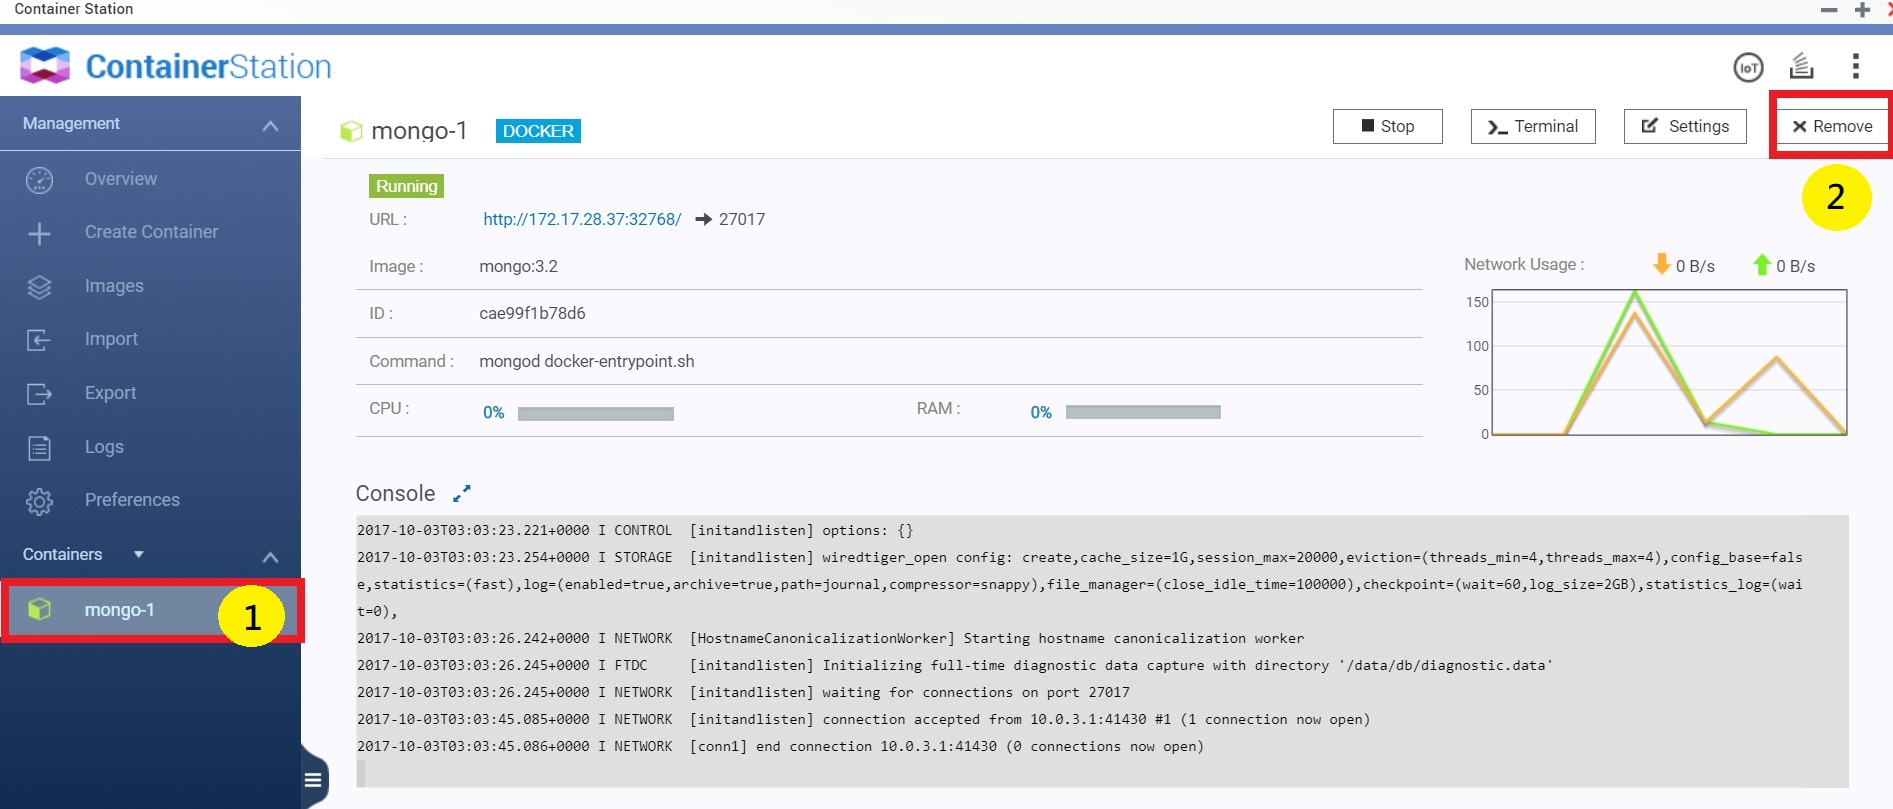
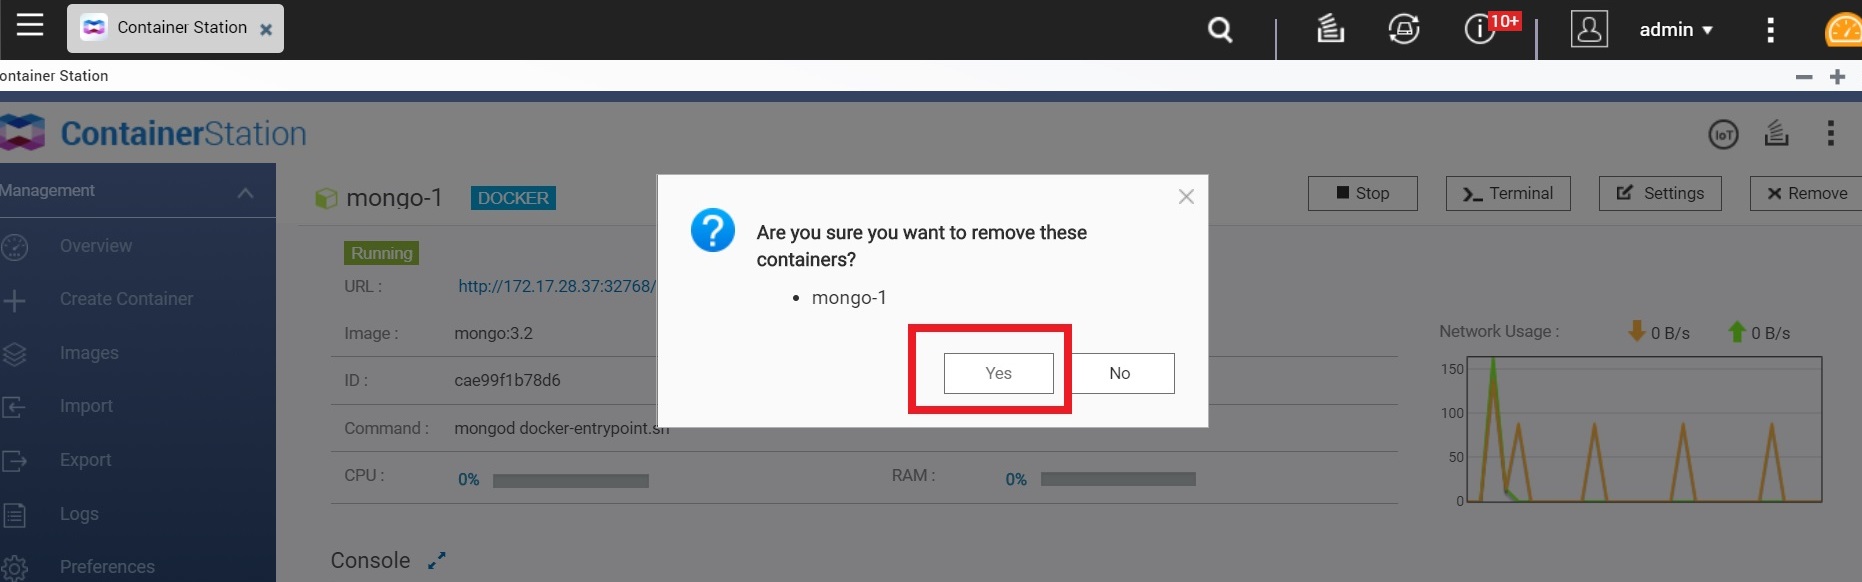
●Choose"Create Container", and click "Install" to rebuild the MongoDB.
●In Command, enter "mongod --auth". 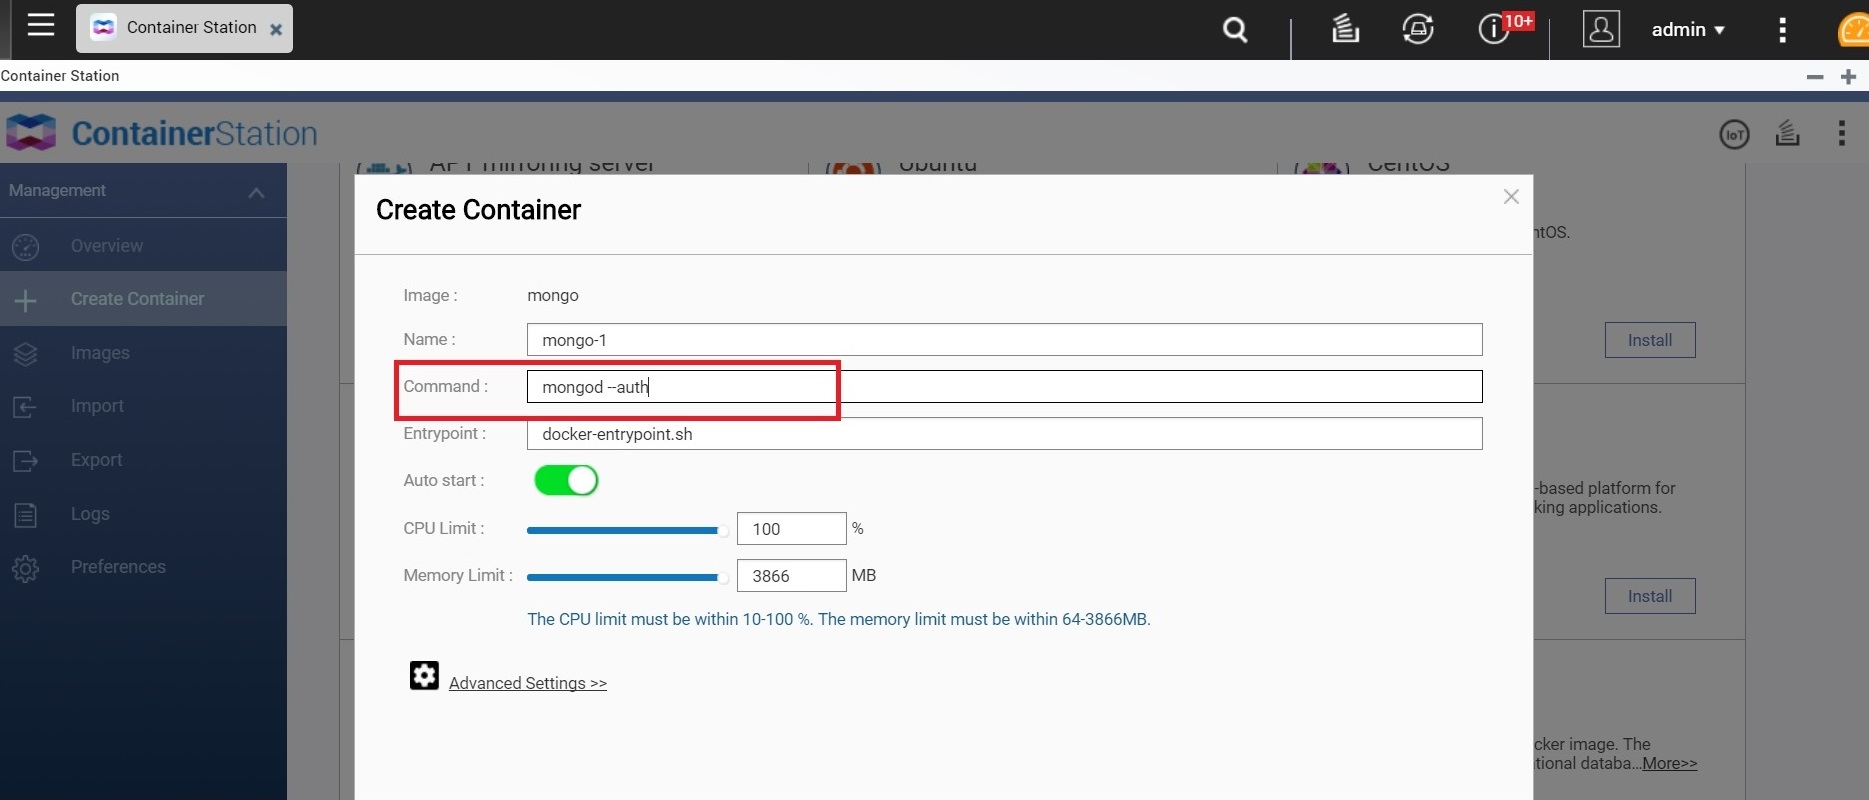
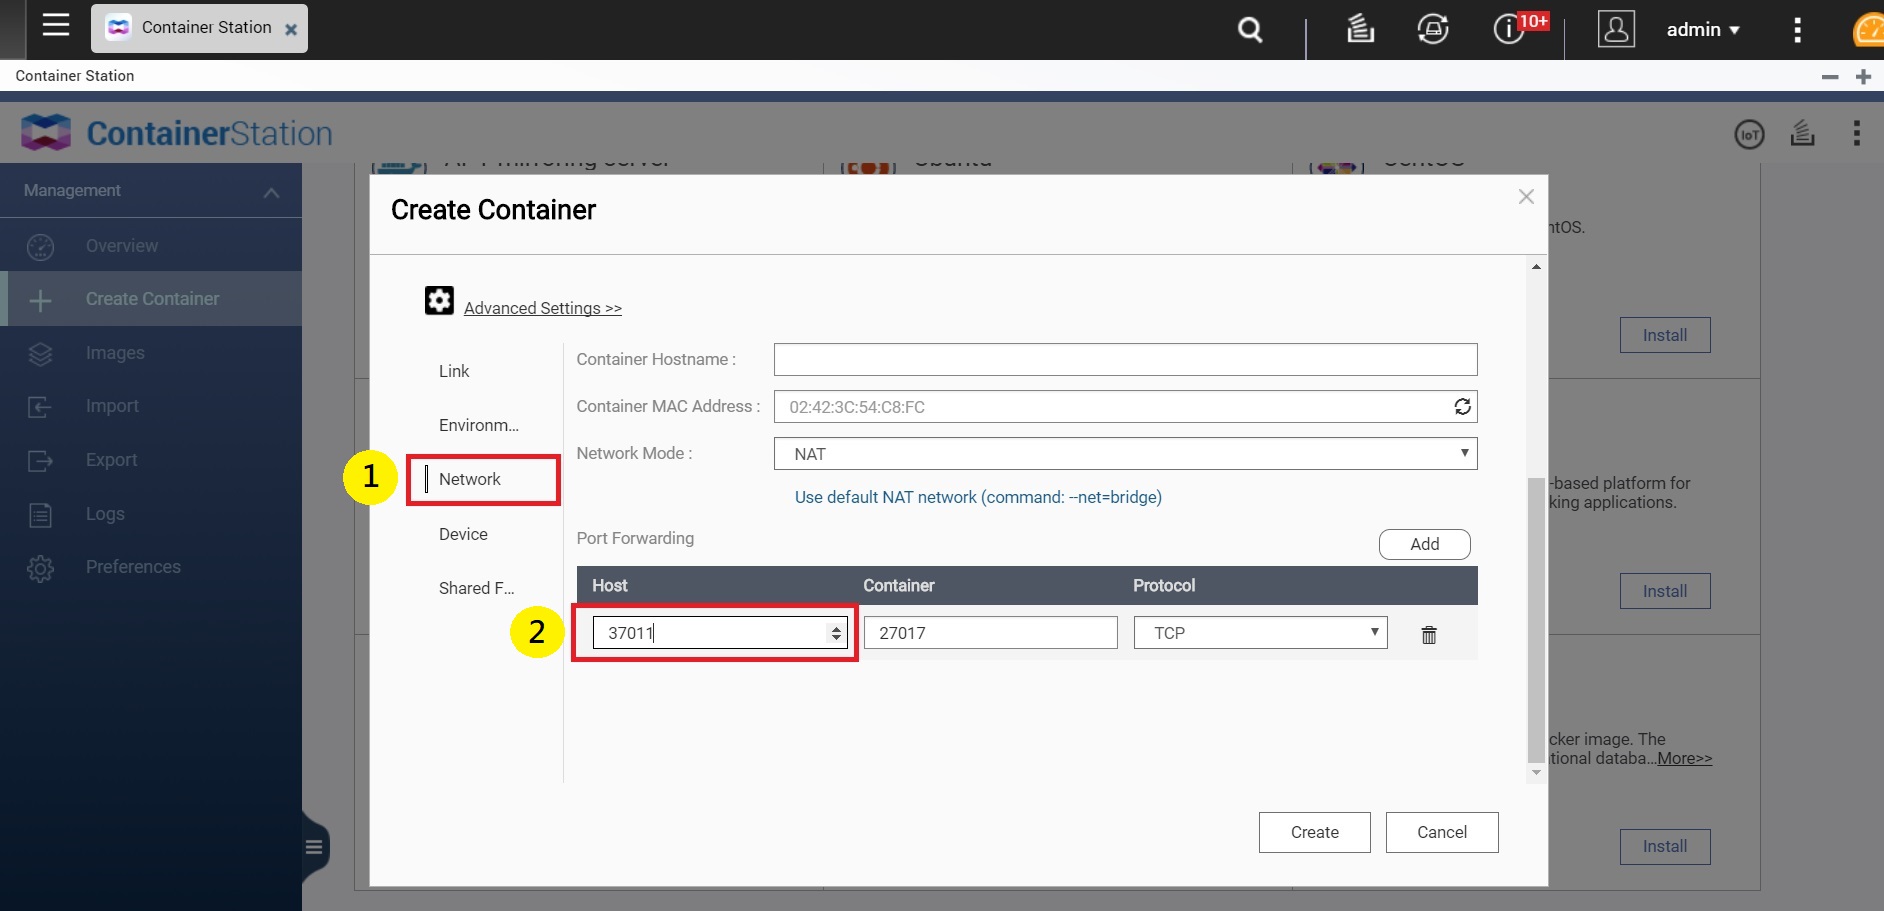
●Click "Advanced Settings".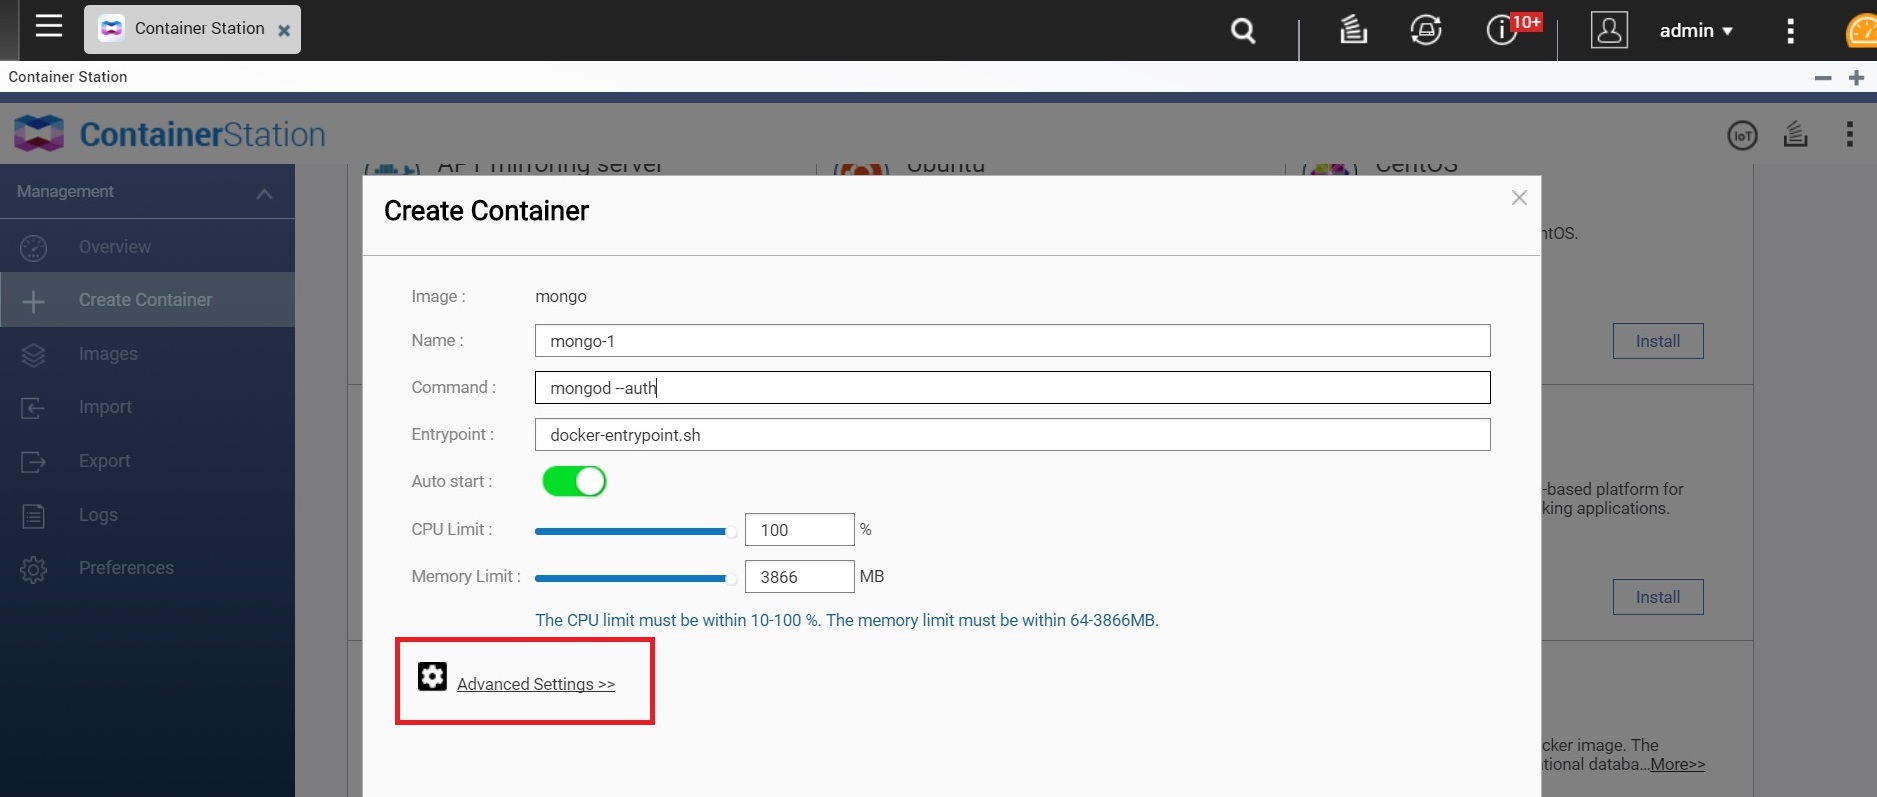
●Go to "Network", enter a value for the MongoDB"port" number (for example: 37011).
●Go to "Shared Folder", and click "Add".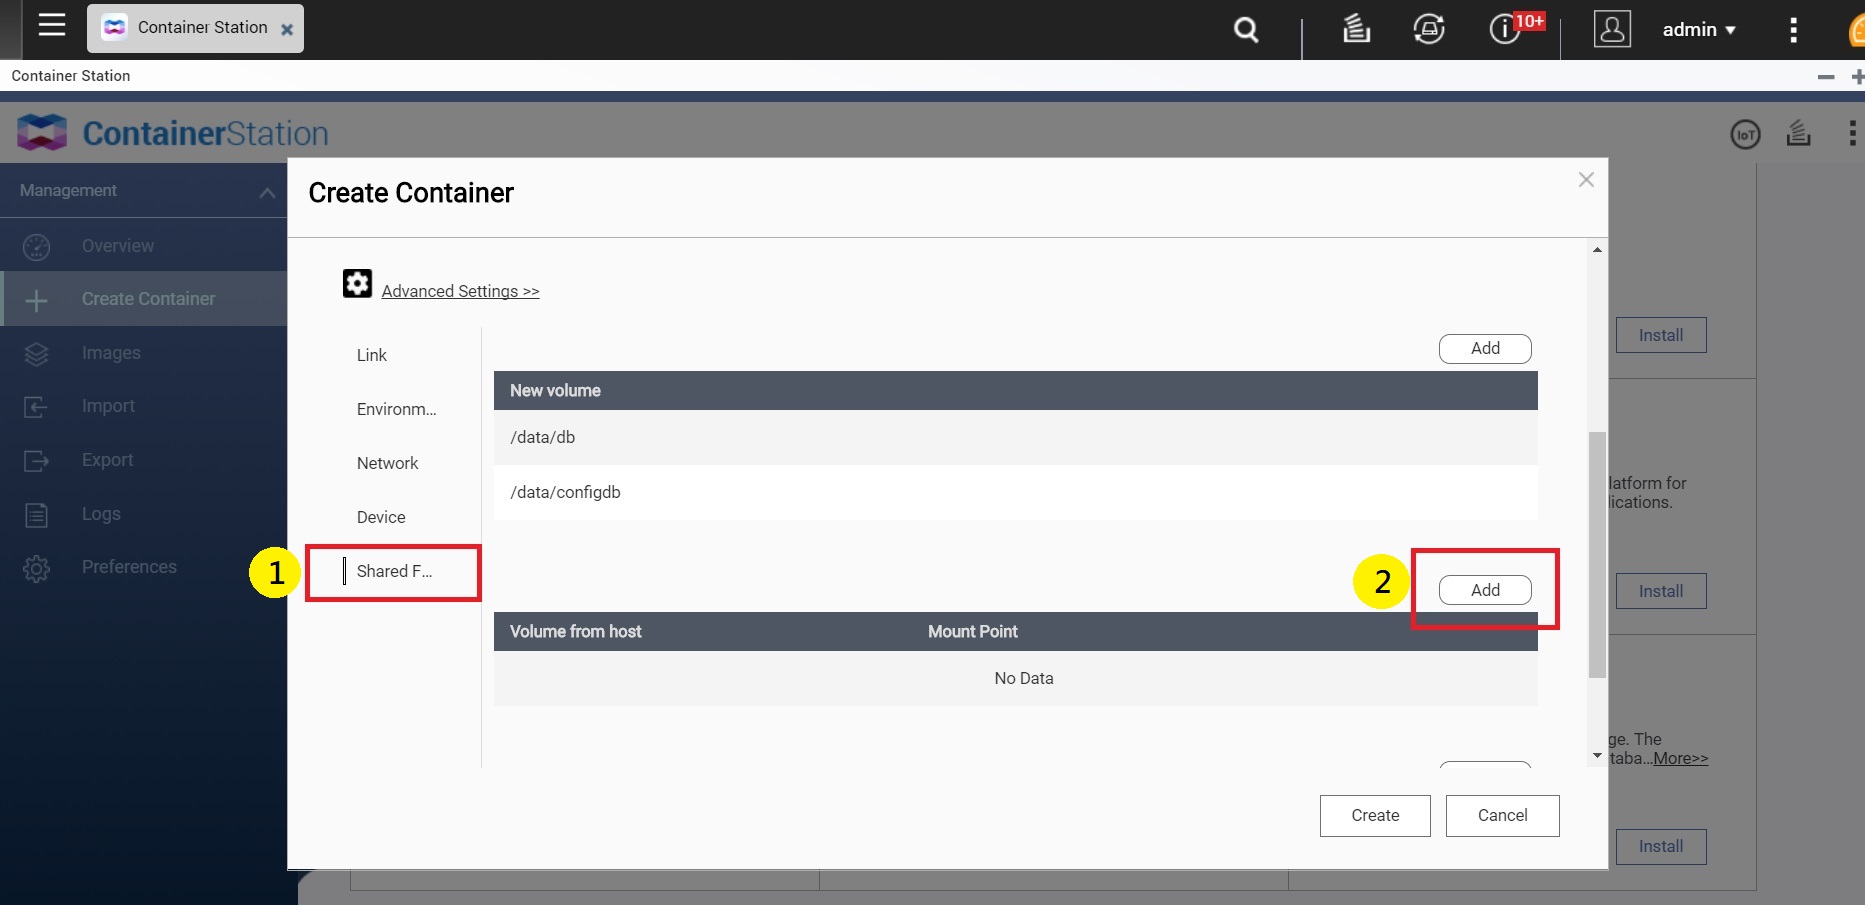
●In "Volume from host" choose the folder you established earlier (for example: Container > Mongo DB > db).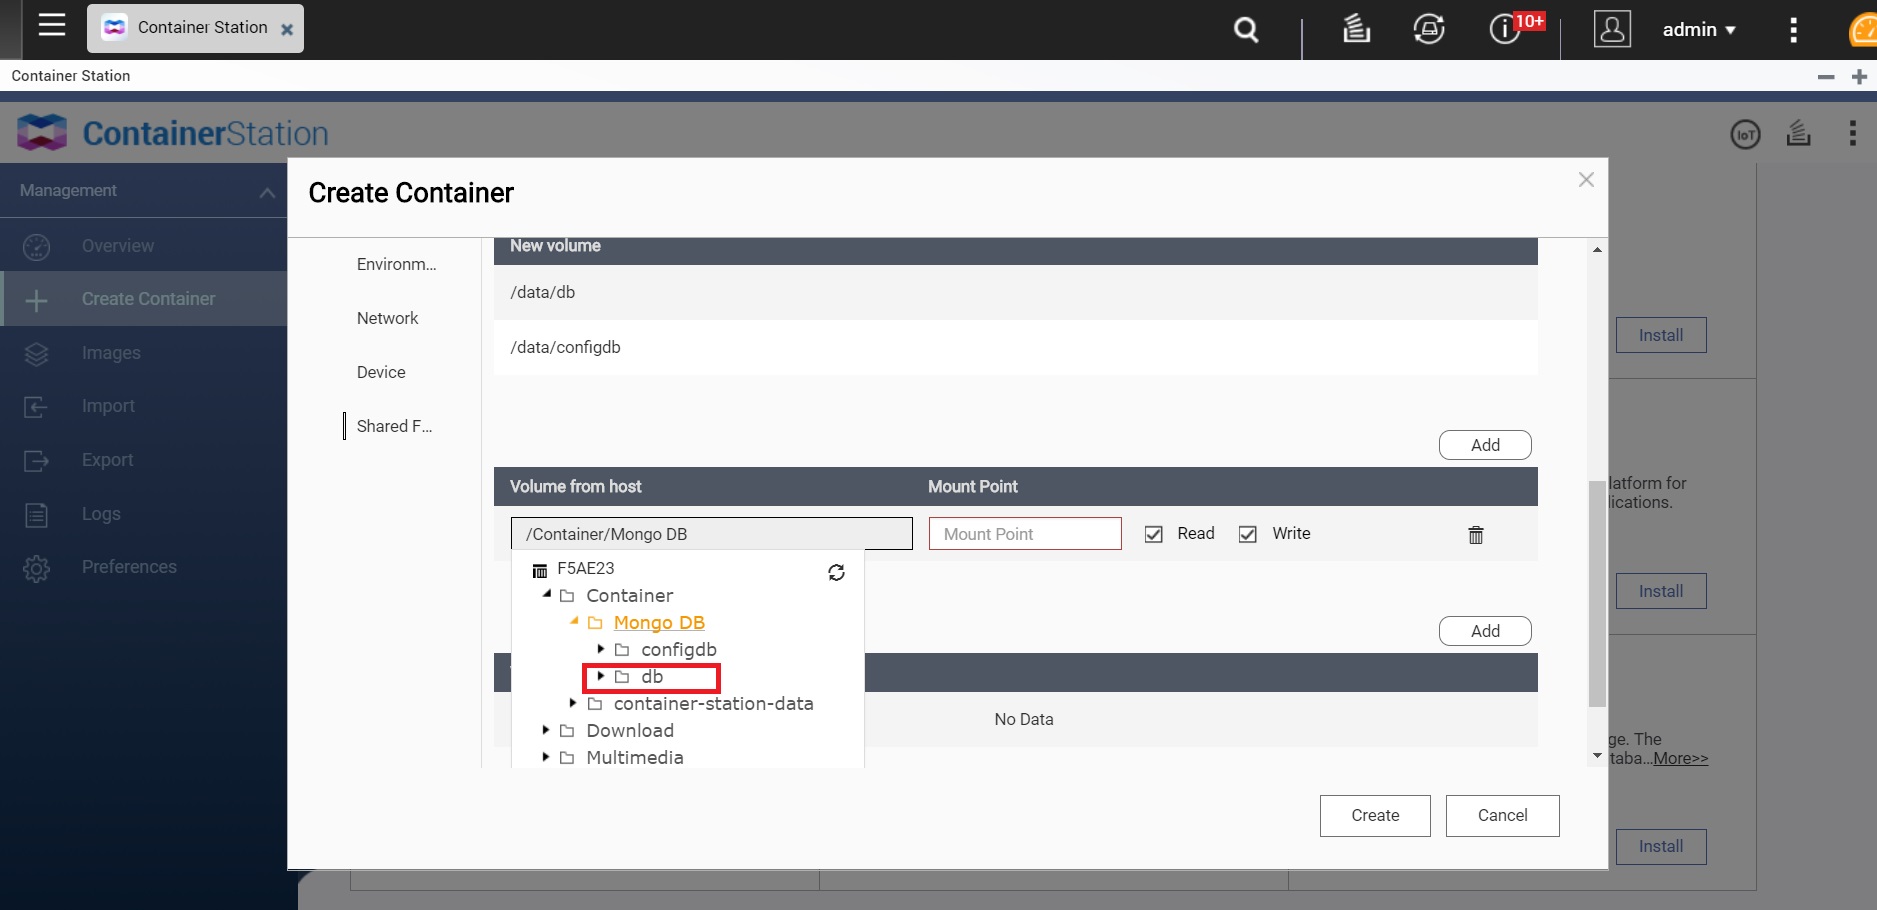
●In "Mount Point" enter "/data/db".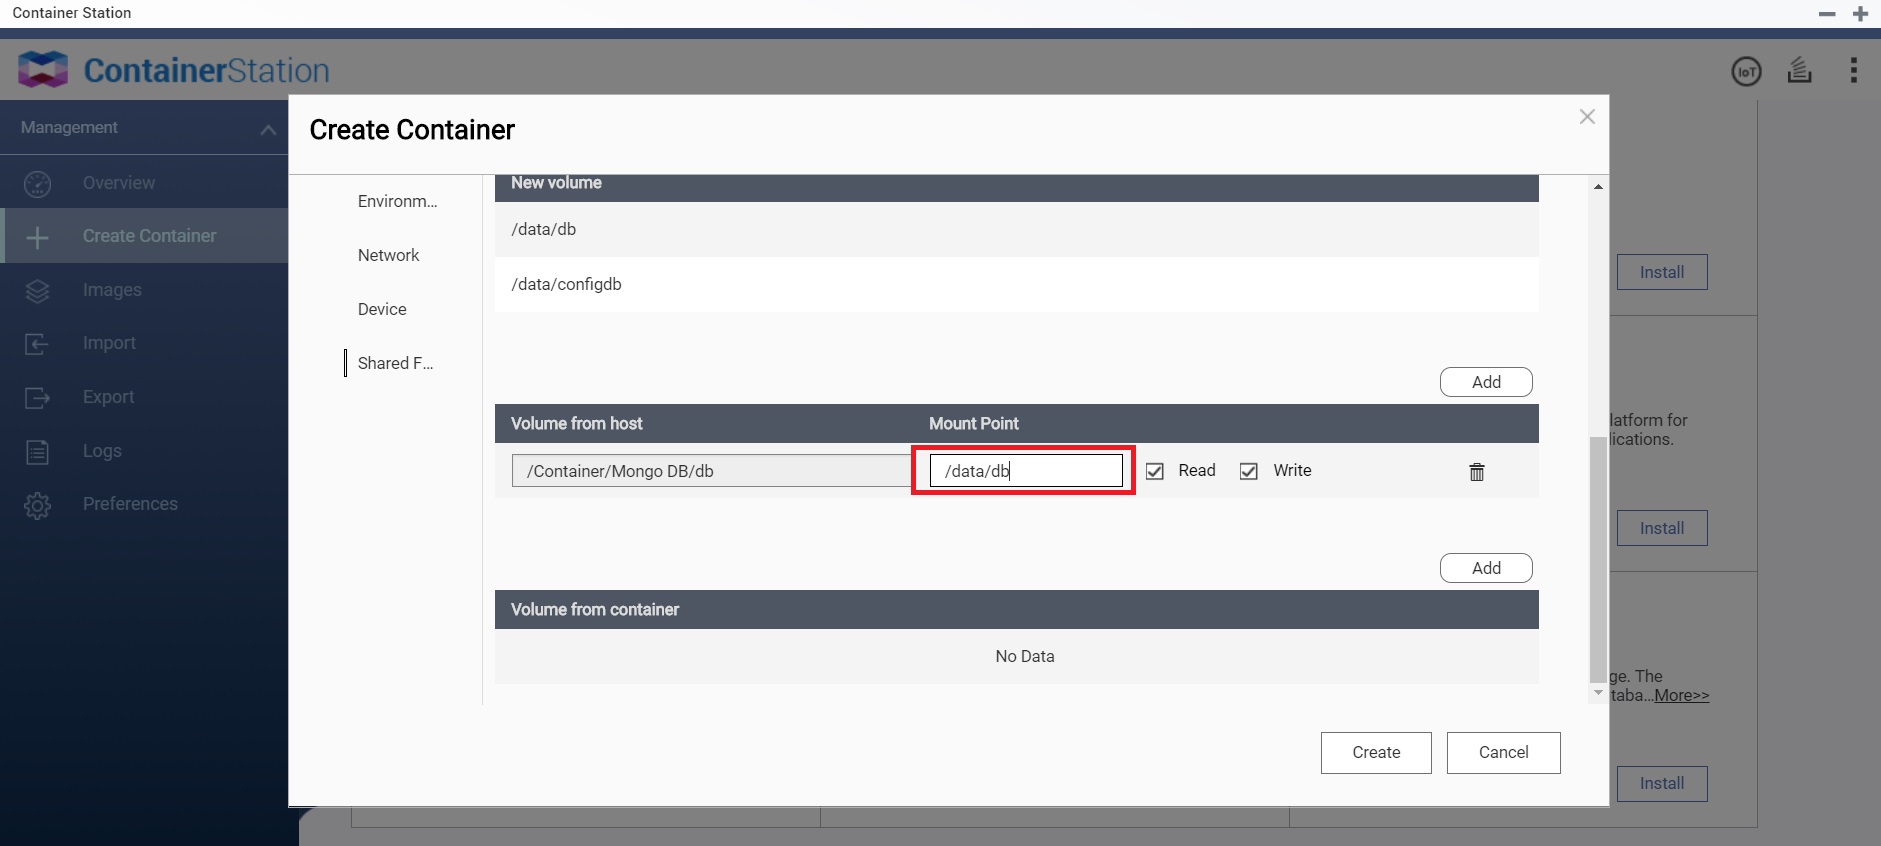
●In "Volume from host" choose the folder you established earlier (for example: Container > Mongo DB > configdb).
●In "Mount Point" enter "/data/configdb". The purpose of adding these commands are for easy backup and modification
●Click "Create"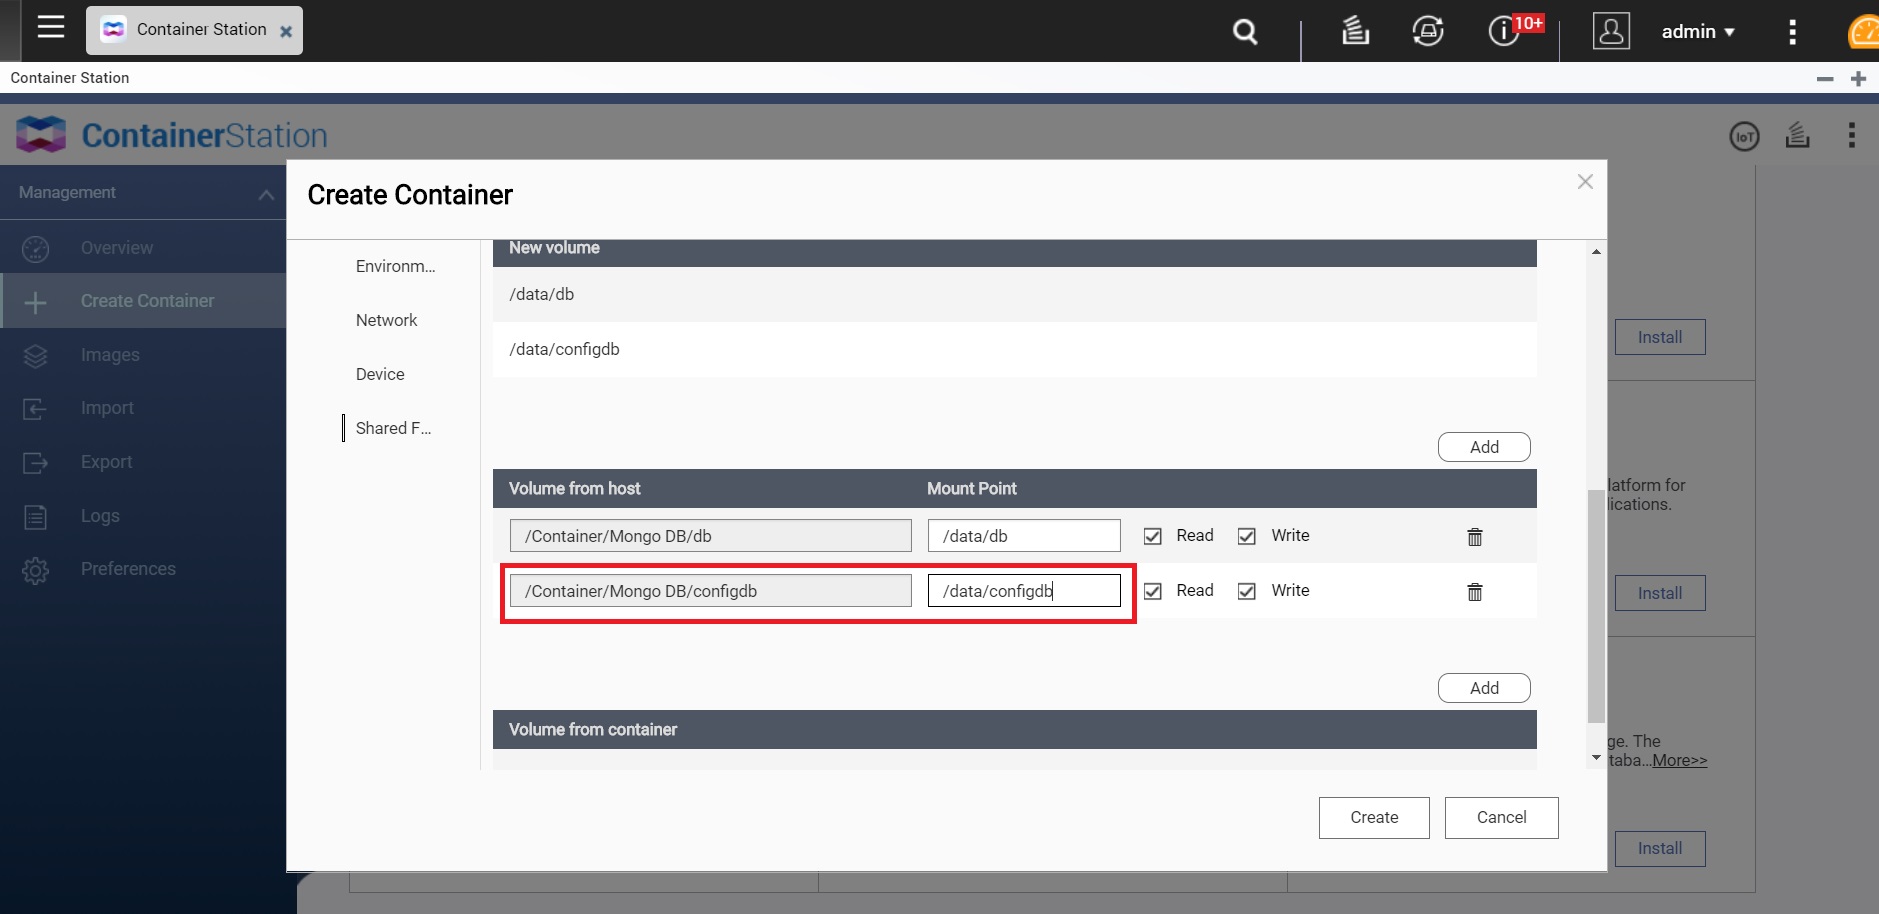
Step_2: Set up MongoDB account and permissions
●You may refer MongoDB DockerHub instructions for more information on setting access controls.

●Establish an account: In your MongoDB container, click "Terminal", enter "mongo admin", and click "OK".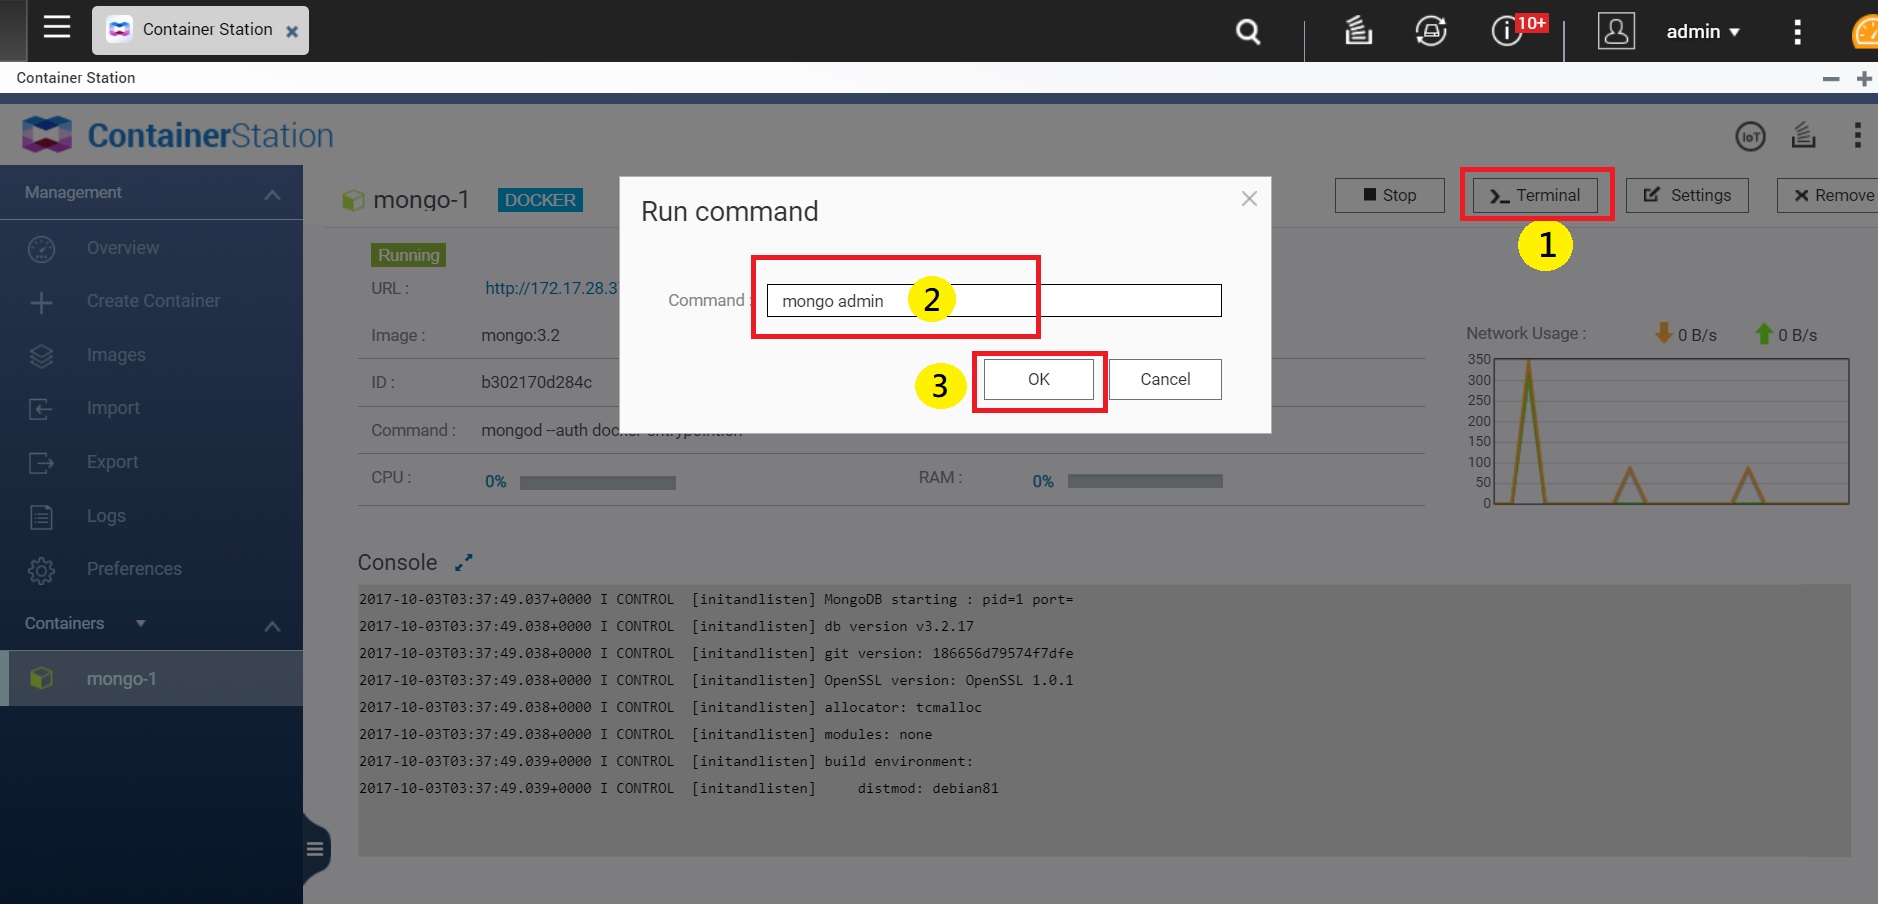
●Enter the command"db.createUser({ user: 'input account', pwd: 'input password', roles: [ { role: "userAdminAnyDatabase", db: "admin" } ] });".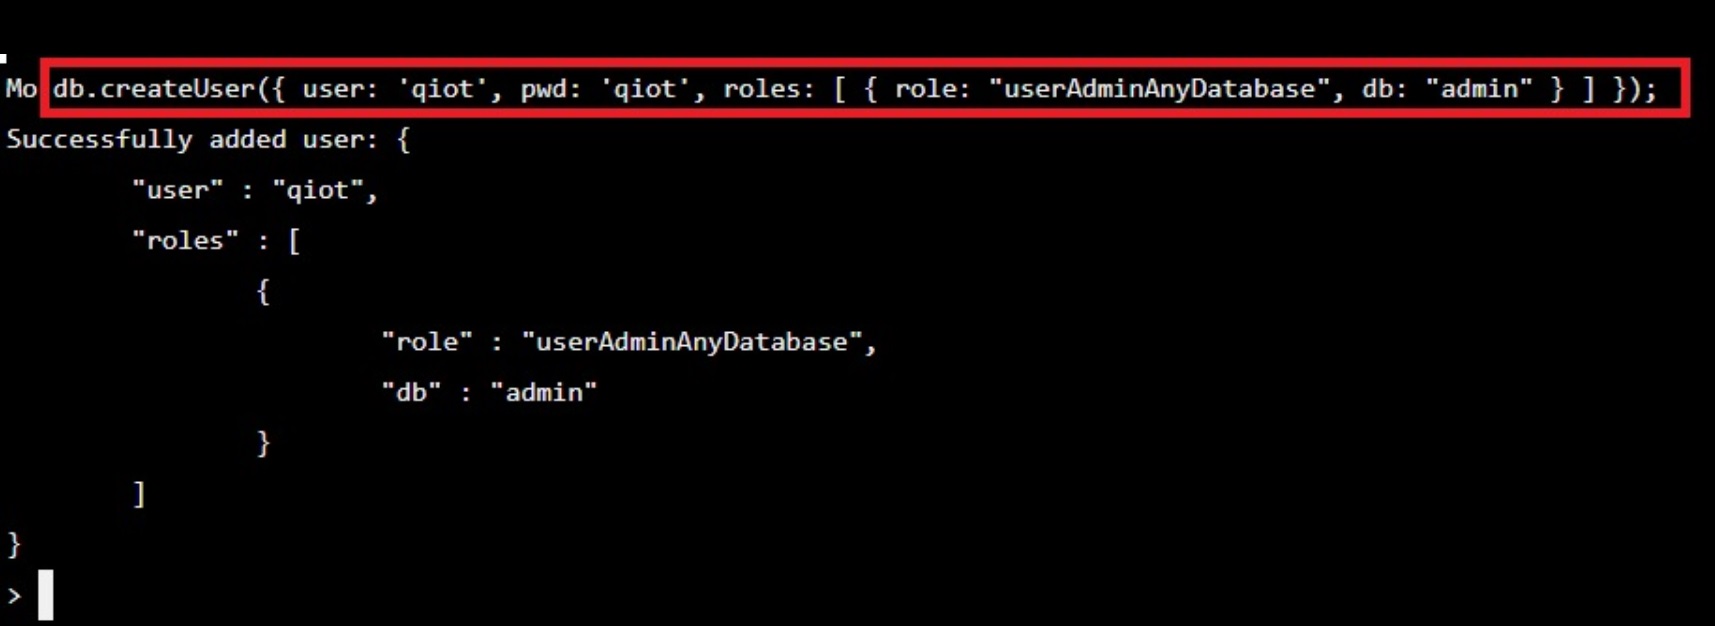
●Return to the MongoDB container, click "Terminal" and enter the command"mongo -uinput account-pinput password--authenticationDatabase admin".
●Click "OK".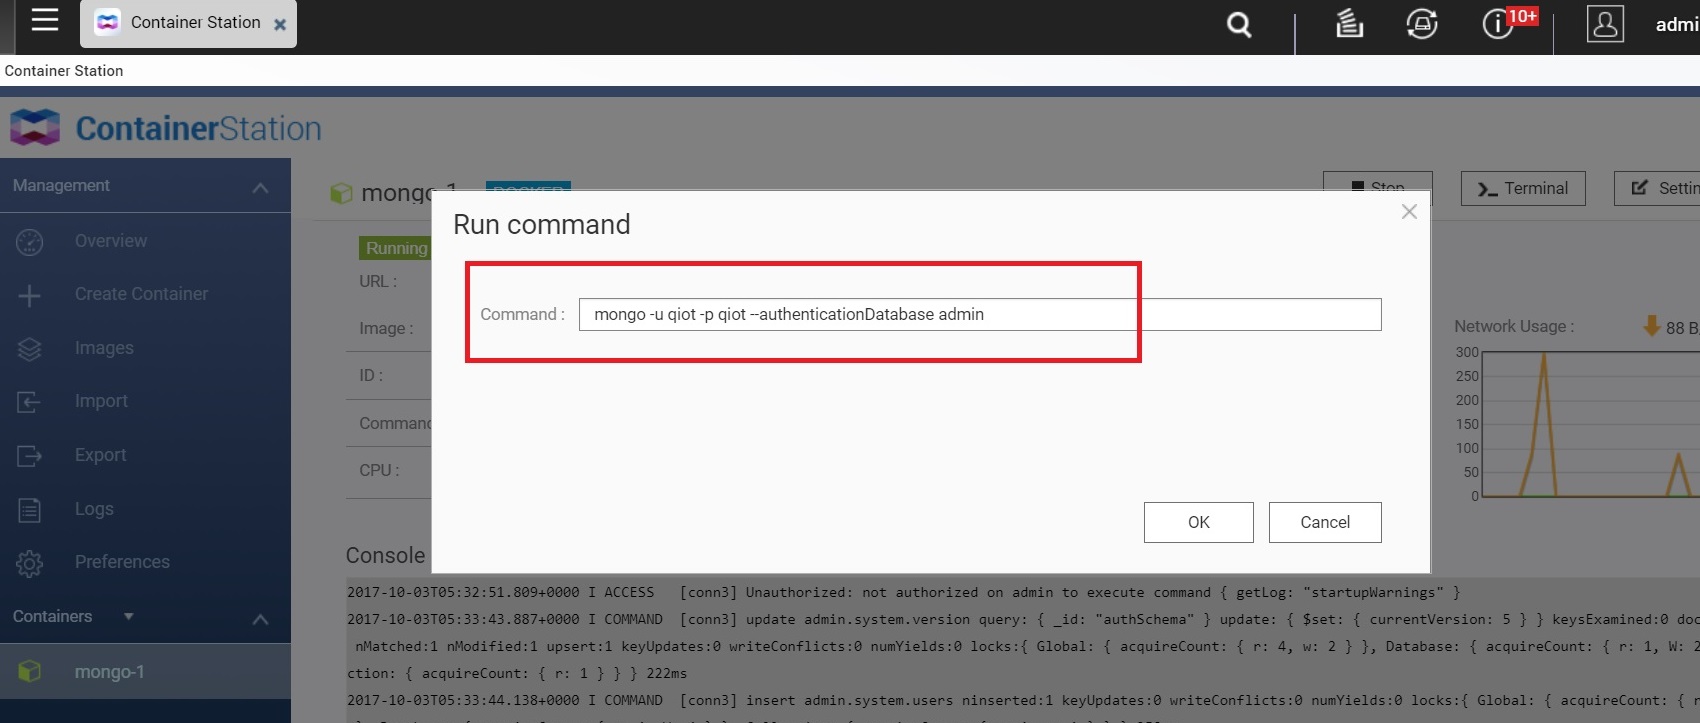
●Enter the command "use database name" (for example: "use qiotdatabase").
●Enter the command "db.createUser({ user: "input account of DB", pwd: "input password of DB", roles: [ { role: "dbOwner", db: "input the DB name you established previously"}]});"
(When you "establish another new account and password", it cannot be the same as the previously created user account (for example: "qiotduser")).
Step_3: Connect MongoDB to QIoT Suite Lite
●Open your IoT Application and click "Rule".
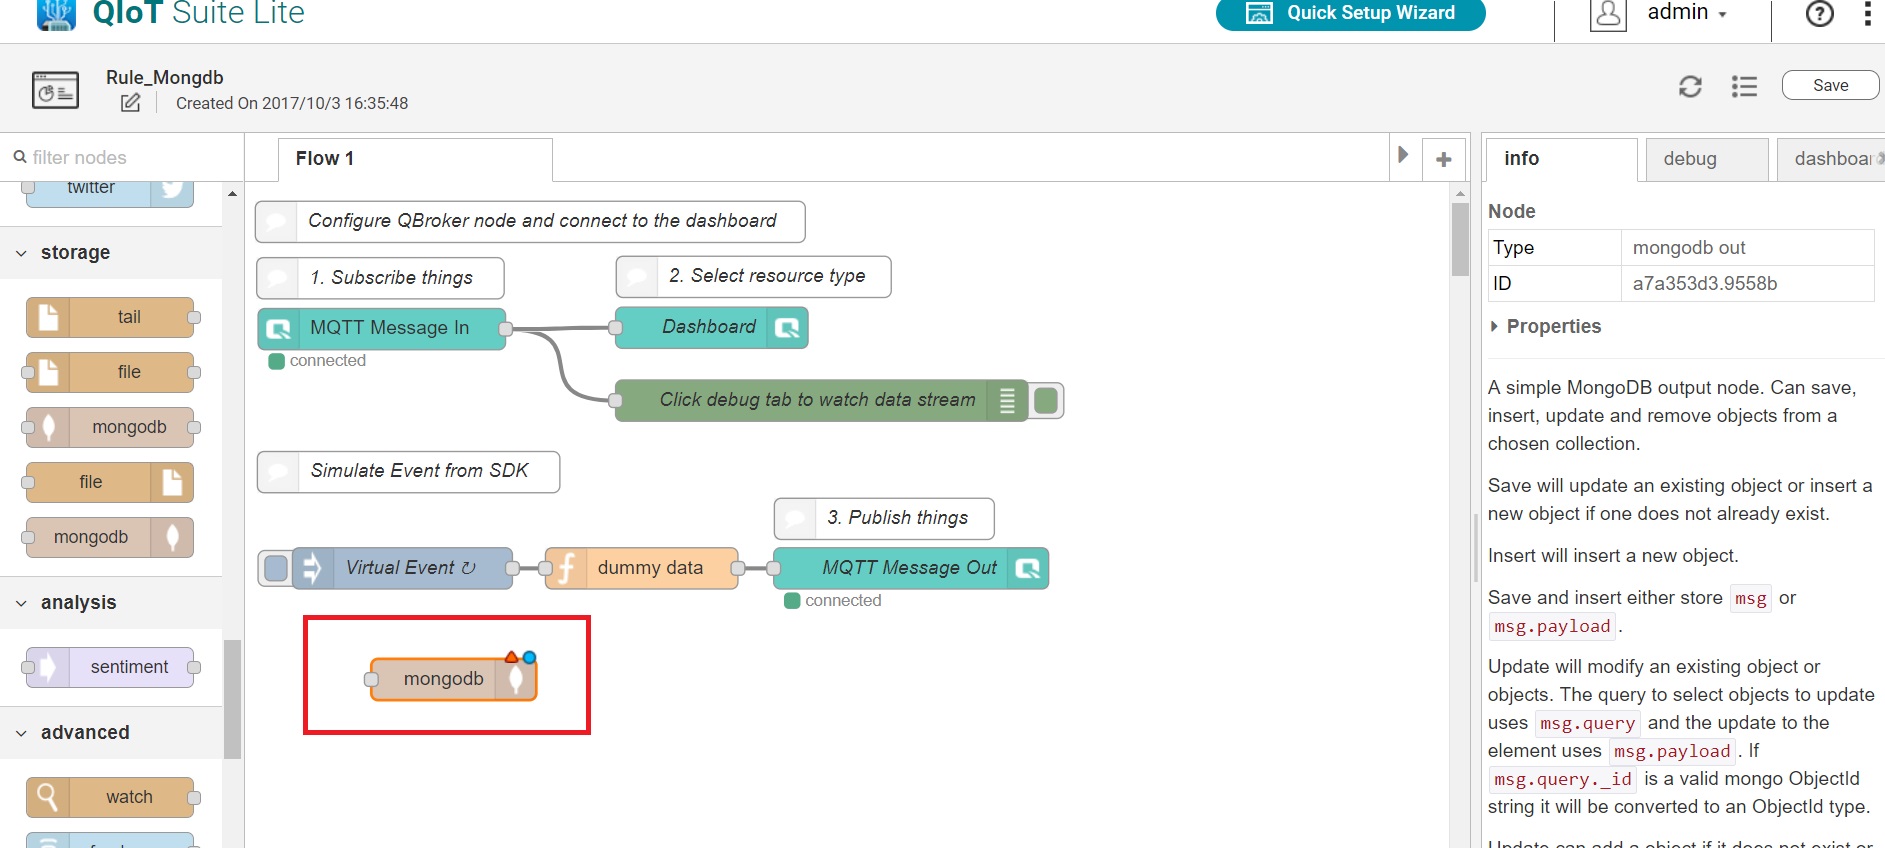
●In "storage", choose "mongodb" and pull it into Flow 1, and double click it.
●In Server, click the right button to add a new mongodb.
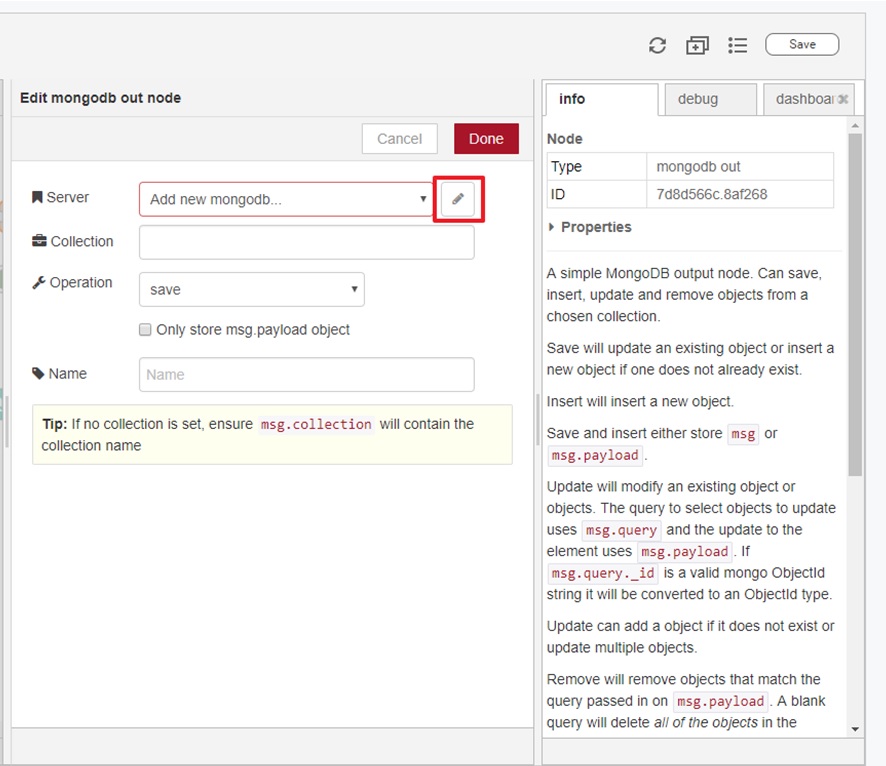
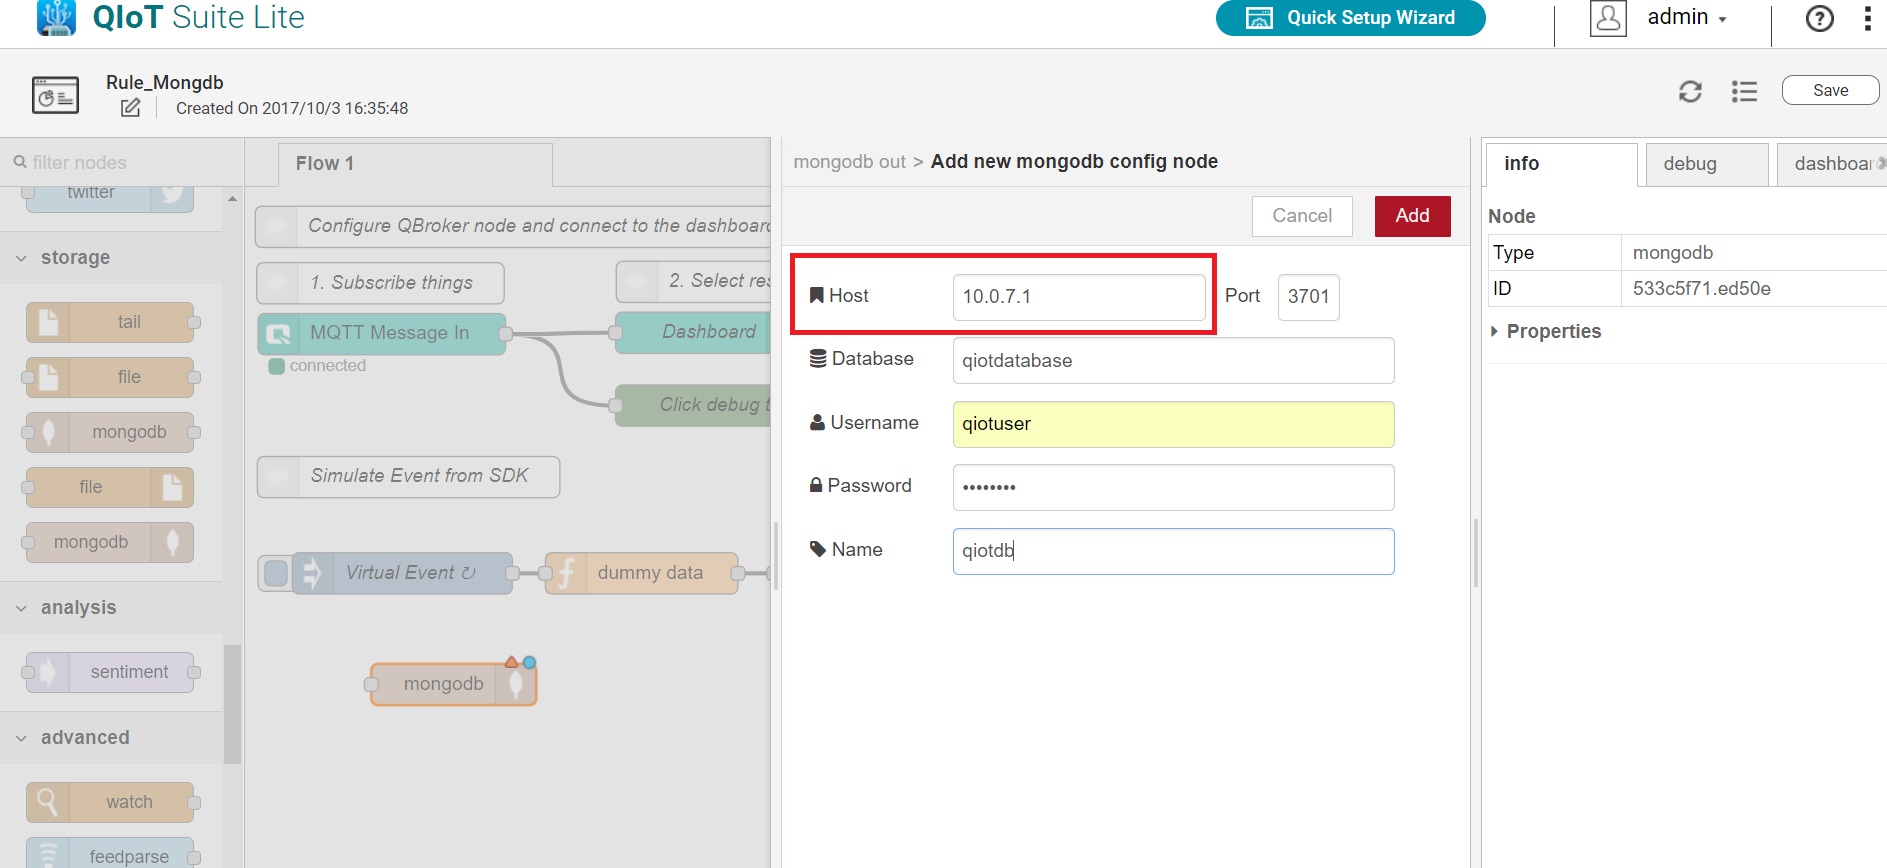
●Enter the below information:
Host: 10.0.7.1(Must be this IP)
Port:The port number you set up earlier (for example: "37011").
Database:The database name you set up earlier (for example: "qiotdatabase").
Username:The username you set up earlier (for example: "qiotuser").
Password:The password you set up earlier (for example: "qiotuser").
Name:Enter a name (for example: "qiotdb").
●Click "Add".
●Enter a name in "Collection" (for example: temp).
●In "Operation", choose the operation you want. (More information, read the MongoDB website).
●Name: Enter a name.
●Click "Done".

●In "storage", choose "mongodb".
● In "function", choose "function". Then pull them into Flow 1.

●Double click "function", and enter the code you want to set up. (Refer to the "info" section on the right side for more information)
●Click "Done".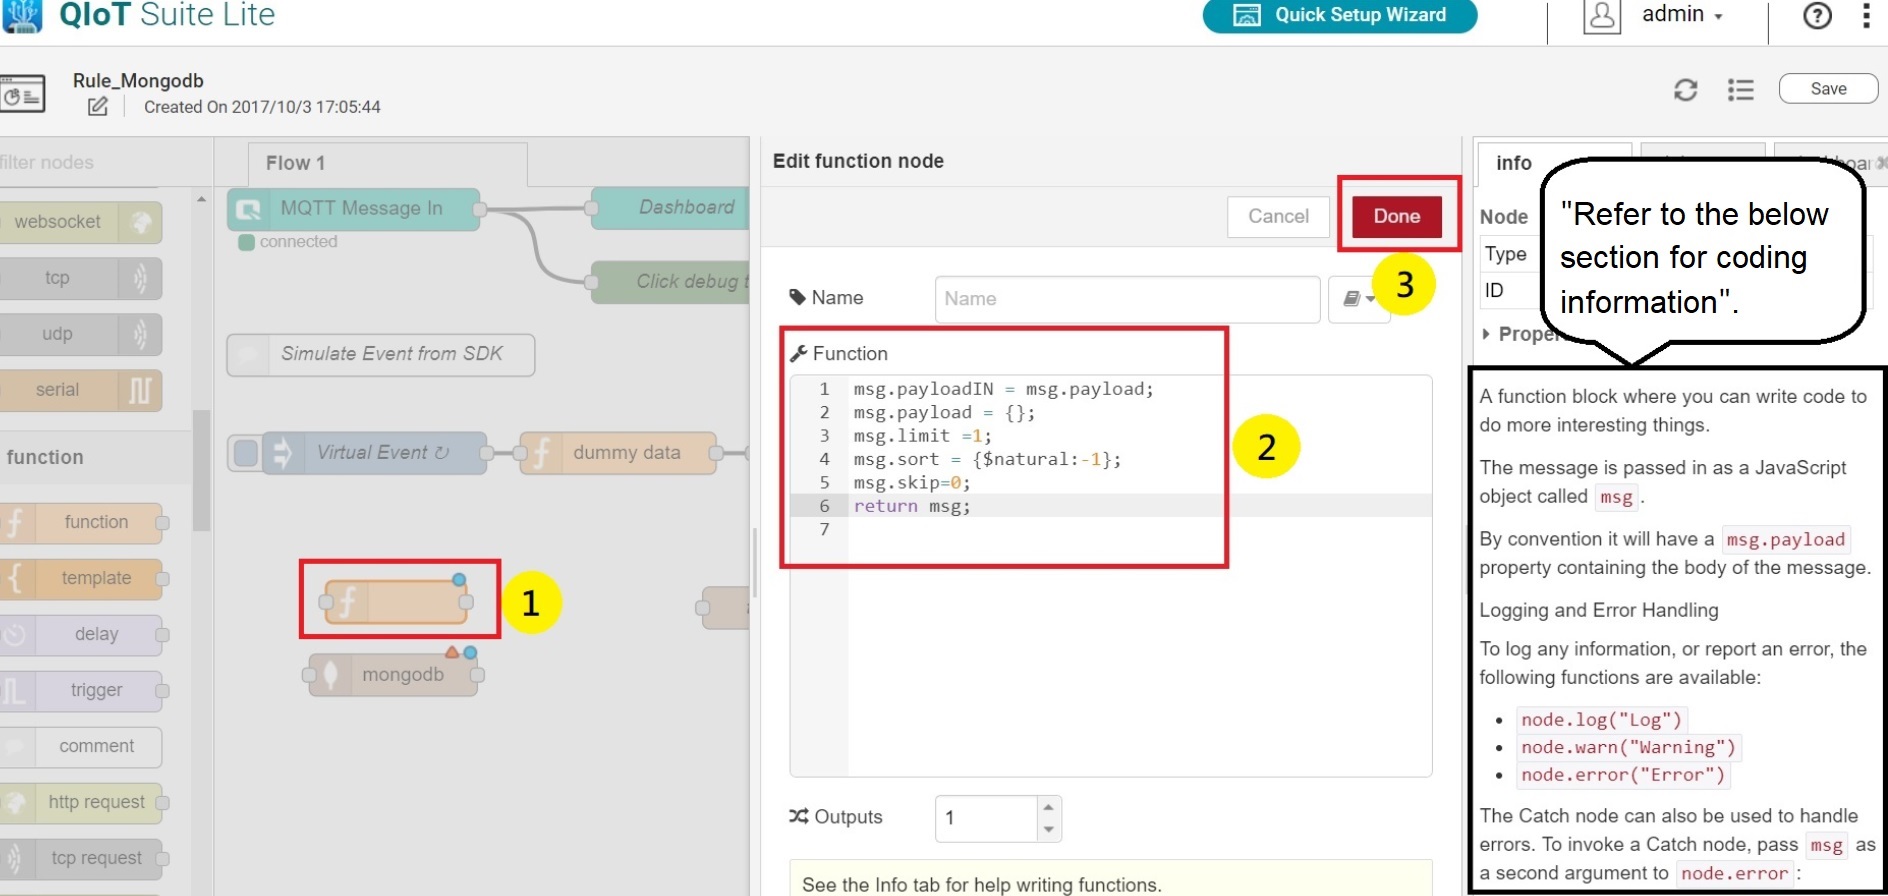
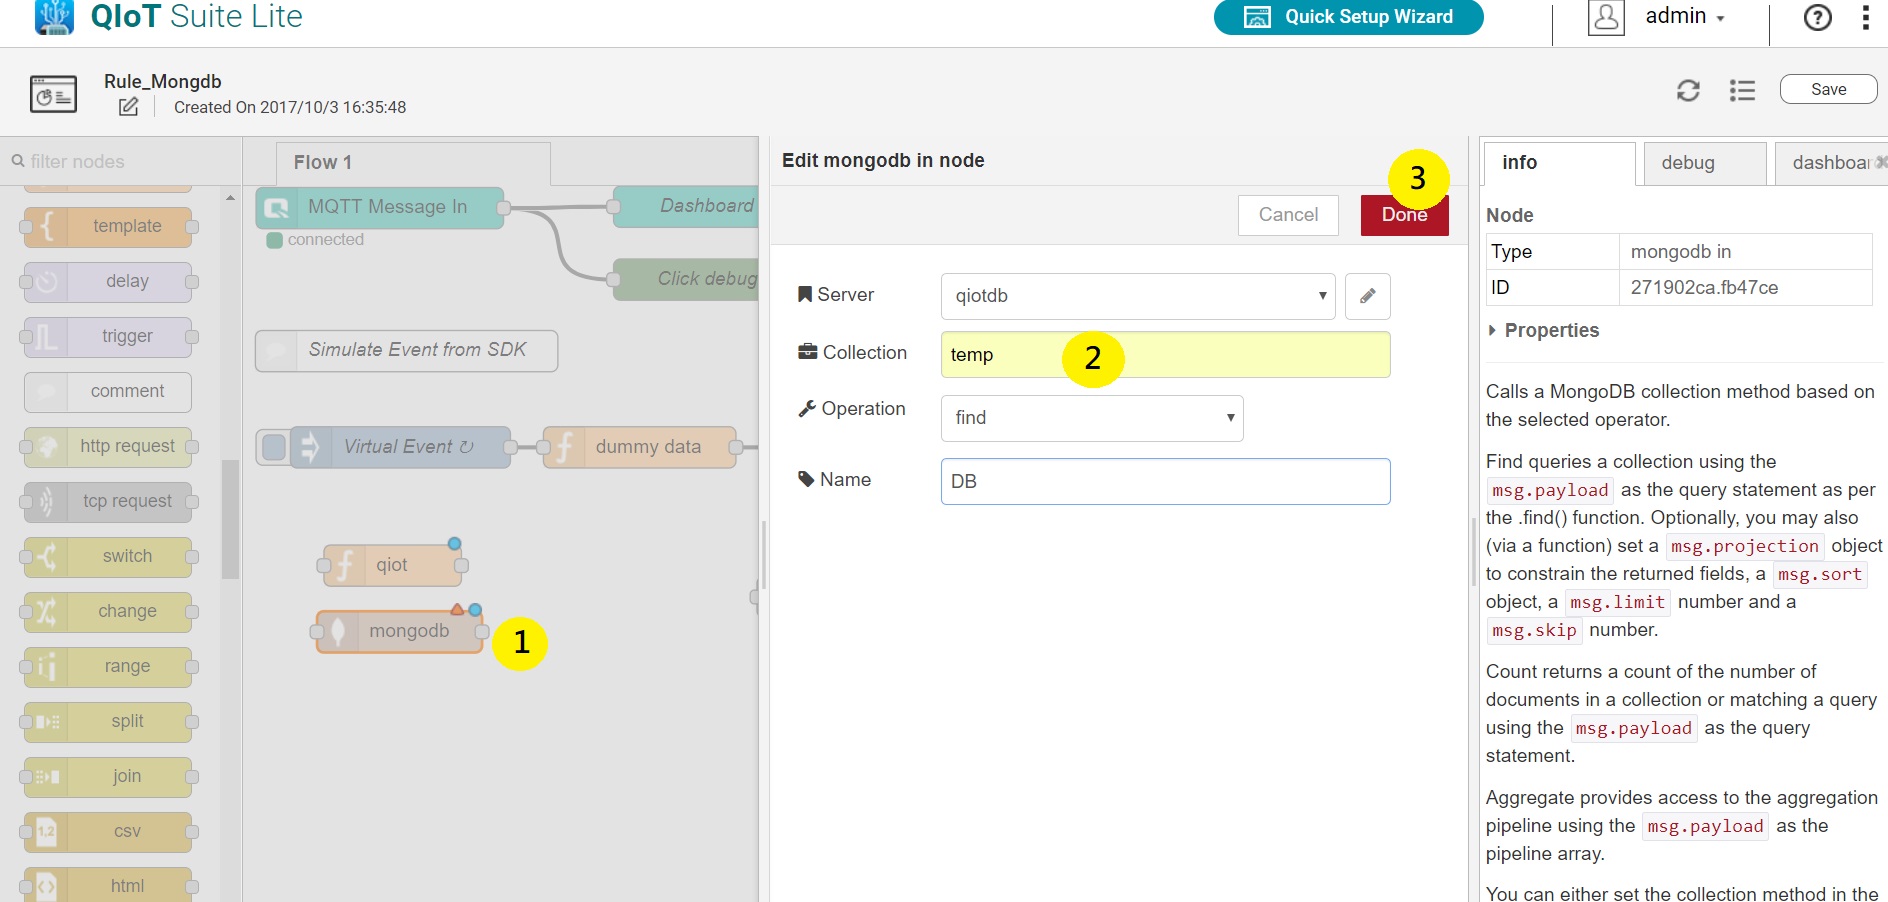
●Double click "mongodb", choose the server name you previously set up and enter the collection name you want (for example: temp).
●Name: Enter a name.
●Click "Done".
●After these settings, you can connect the function node and mongodb node together like below and click "Save".
●On the right side, you will see the value.
